Part 1 | Part 2 | Part 3 | Part 4
Choosing the hardware
My first task was to find an off-the-shelf device to use for Screenie. Time to go shopping! I decide to go with something Arduino based, there are some great, low-cost, pocket-sized dev boards out there nowadays, and the ecosystem is well-supported. My basic technical requirements were:
- A screen (to display the countdown)
- At least one button (to start/stop it)
- A buzzer (to sound the alarm).
- Wifi (to sync up the allowances and sessions)
- A case and battery so it’s portable. Bonus points for rechargeable.
- Must cost less than £20 ($25)
After some research (using plenty of AI agents to do the legwork, of course) I shortlisted the LilyGo T-Display-S3 and the M5Stick2 Plus 2. Both were great options, and the LilyGo was much cheaper.
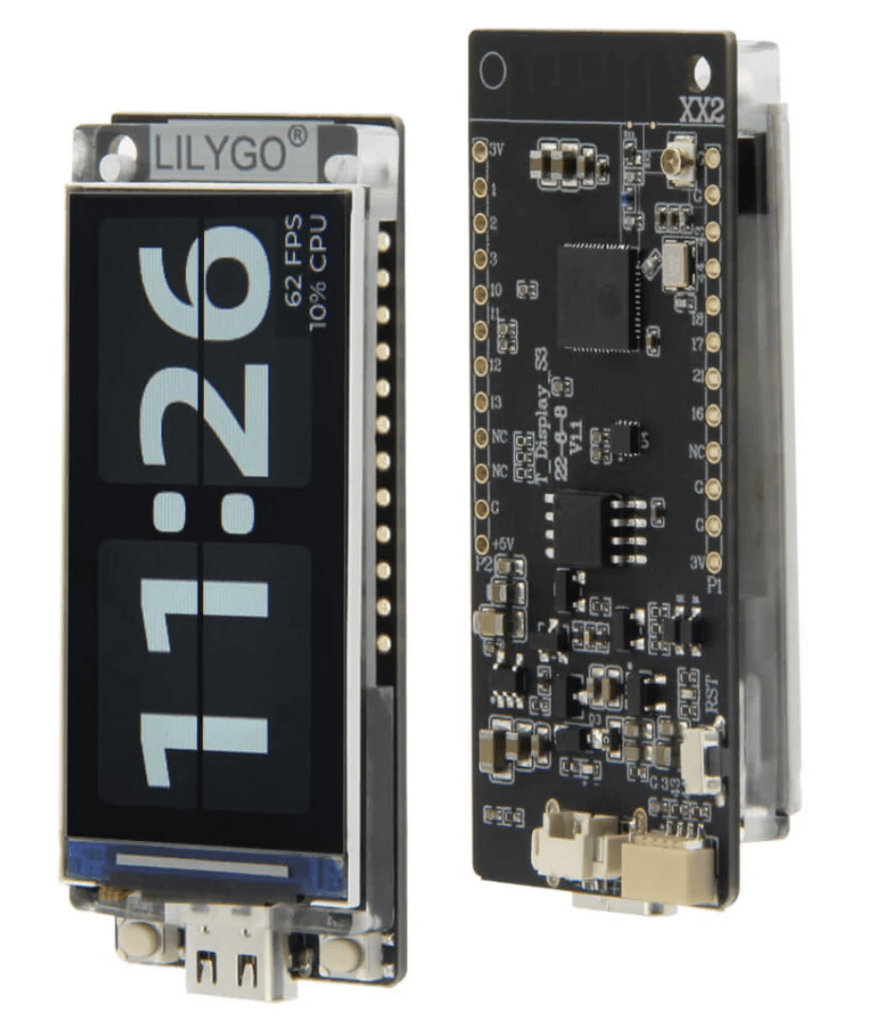

I ultimately went with the M5Stick2 Plus 2 as it included a case and battery, thus ticking all the boxes. If you’ve not encountered one of these before, it really packs a punch for its cost and form factor, hitting the nerd community headlines recently as a customisable version of the Flipper Zero pen-testing device. Its key specs are:
- CPU: ESP32-PICO-V3-02 dual-core processor at 240MHz
- Screen: 1.14-inch TFT LCD (135 × 240 px)
- Memory: 8MB Flash, 2MB PSRAM
- Connectivity: 2.4 GHz Wi-Fi / Built-in Bluetooth 4.2 support.
- Battery: 200mAh rechargeable lithium battery
- Buttons: 3 x Custom buttons (including power button)
- Sensors: 6-axis IMU (3-axis accelerometer + 3-axis gyroscope), microphone (SPM1423)
- Other features: IR emitter, RTC (real-time clock), LED, buzzer
Significantly over-specc’d for my requirements, but perhaps handy for other future projects.. ..Infra Red blasting support is cool too, I suppose might be quite a fun trick if the Screenie sent an IR code to turn off the TV when device time is up!
The M5 stack ecosystem is a nice-to-have for future expansion, including a bunch of optional add-on ‘Hats’, so future projects could involve using the device to drive mini robot tank, fly a drone or even take thermal imagery at night. (or all three at once if anybody can figure out a use case…)
Time to pick a language stack: I could have gone with Micropython, C++ or there’s also m5’s own no-code platform called UIFlow (similar to Scratch) which might be a fun way to teach the kids coding in future, should that ever be a viable career path again. I’ve decided to code in C++ for the sake of performance (it’s a non-interpreted language and binaries are small) and then compile and flash from my MacBook via USB. I should be able to use LittleFS to transfer PNG files too, as the M5 libraries have good support for decoding and displaying image files, so there’ll be no mucking around with converting images to byte arrays etc. unless power restrictions really demand it. (or I’m feeling bored)
Product design & requirements
Time to spec things out! My v1 behavioural requirements for the Screenie device were:
- Intuitive foundational UX – screens, app header and menu system.
- Login to ‘My Family’ account, somehow.
- Sync with the web app to fetch daily allowance / child avatar.
- Large countdown display, with start/stop button.
- Loud alarm for ‘time nearly up’ / ‘time up’.
- Support for ‘ask for more time’ to send request to the web app for more time and get confirmation of acceptance
- Min 48hrs battery life, ie leverage ‘deep sleep’ mode.
I know I said my kids are lovely humans, and they are. But I also wondered whether I should add any anti-fraud features in case they’re tempted to try and game the system. Fortunately, in a previous life I founded a mobile transport ticketing company, so my learnings from this are bad news for the miscreants: I’m adding to the list of requirements:
- ‘Recent activation’ alert: the device shows if the timer has been recently started
- ‘Minimum session’ support: if I don’t enforce this, my son will be forever stopping the damn thing and claiming exemption for things like PS5 loading screens. So, the intention is that you can’t stop the timer in the first 5 minutes, without losing that time. We’ll probably need some sort of UX / warning system around this too.
My v2 (stretch goal) requirements were:
- QR code login for automatic device pairing (ie obtaining an API key)
- Wifi provisioning so it’s easily usable outside the house, or in other families.
Design time
I forced myself to take a design-first approach. Actually, this is a lie: I was stuck waiting for the shiny thing to arrive from China and had nothing else to do. So, I dived into Figma to create some basic UX/UI designs.

With a tiny display, no touchscreen and only 3 buttons, this was an interesting challenge. Some of the key design principles I landed upon:
Consistent button navigation
With just 3 buttons, it needs to be obvious what to press and when you press it. Keeping consistency across screens makes this more intuitive:
- Button 1: Select (‘do the thing’)
- Button 2: Menu (invoke menu / cycle through)
- Button 3: Go Back / Cancel
If I ever got to build my own case/hardware, I’d relocate the buttons so their positioning reflected these functions, and perhaps include some pointers to them in the UX.
Large fonts for easy readability
The 1.14-inch TFT LCD screen has a decent resolution, but that’s a teeeeeny amount of physical space. So, ideally we’ll want a minimum of 12pt for labels and text, where possible. And, no, it wasn’t always possible.
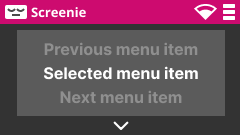
Single-line menu system
My early wireframes had dropdown desktop-like menus, but these were virtually illegible on the tiny screen. Later designs featured a ‘3 items per page’ menu which was more readable and contextual.
Minimal verbosity
Notifications and labels needed to be brief and to-the-point.
Bold UI and theme color (suitably bright for kids use)
Pink. Always go pink.
Coding the screenie
For actually coding the thing, I was keen to leverage AI-assisted coding where possible. (This isn’t the same as vibe coding, and if you don’t know the difference, that’s absolutely fine, I promise to remain calm) At work, I’ve had huge success with GitHub Copilot (running in agent mode with Claude Opus 4.5) particularly with React Typescript, where I figure the LLM training data must be particularly rich given that the entire world seems to be web developers nowadays. So I was interested to see how useful this might be for generating C++, as I’m definitely a little rustier in this space – and I’d be lying if I said I was eager to return to a world of pain involving pointers and header files!
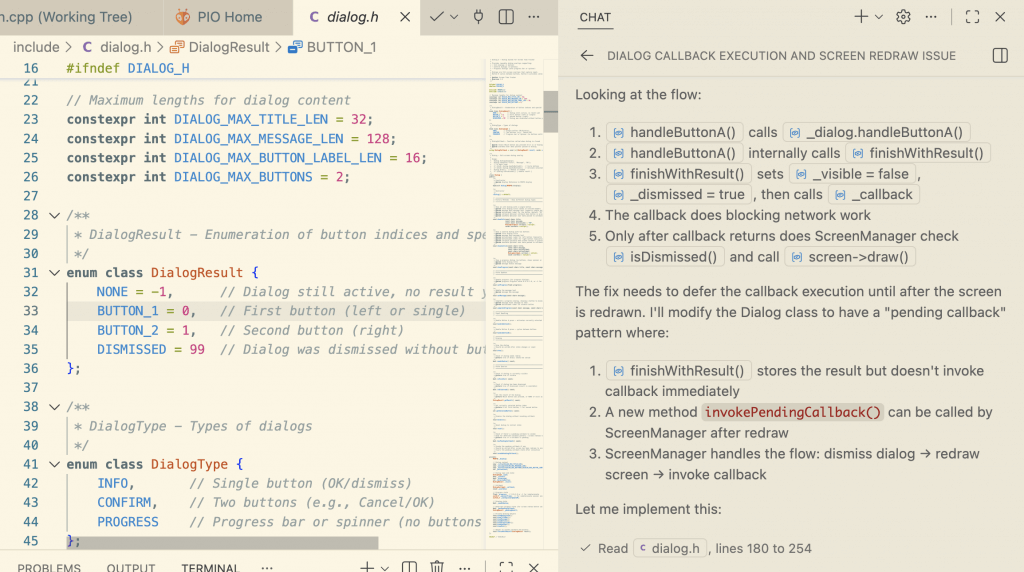
AI Coding tips & tricks
It turns out that recent LLM models are indeed very capable at generating well-written C++. Claude Opus 4.5 was able to get me up-and-running super quick with a basic framework of management classes and graphics. The usual caveats for working with AI applied — ie. there were a few times I had to clean up or re-prompt to discourage it from overly duplicating code or straying from best practices. Some of my tips for working with GitHub Copilot and an Arduino project:
- Set up the vanilla project first, with the correct PlatformUI ini files and the M5Unified / M5GFX libraries pre-installed. (you can ask it to help, but don’t begin the rest of the project until you’re happy with the basic build, flashing and library linking)
- Copy over some of the code examples from the M5Unified Github into a ‘Example code’ folder and reference these in your prompts.
- Write some Claude.md / copilot-instructions markdown files to explain the project context, overall architecture and any ground rules re: coding style or preferences. You may be surprised what a difference it makes just adding in a description of the project rationale and requirements, for example. (gotta give those vector embeds a bit of a helping hand)
- I tend to prompt like a technical PMO talking to a senior engineer – i.e. the right balance of requirements and some basic technical guidance. In 2024, this would have been more a case of prompting like you’re talking to a junior engineer, i.e. suggesting class names, appropriate patterns or techniques, etc. In 2026, I suspect it’s more likely that Claude will be the one suggesting a better pattern to me!
Working with the Arduino: lessons learned
After 3 days on-and-off coding, several iterations and some good learnings around baud rates, I arrived at a working version one of the device app. Here’s what I learned along the way:
Power considerations
With a puny 200mA battery, I was keen to avoid doing anything that might reduce the battery life. So network calls need to be made at a minimum (and batched) and the Wifi is disabled between API calls. The trade-off is a noticeable 5-10 second delay when reconnecting to wifi, so I ended up writing a ‘wifi timeout’ layer that keeps it up for a while to deal with rapid subsequent API calls. Polling needs to be limited, but is a nice feature when a kid has requested more screen time and wants to know if their request was accepted. I went with a 15 minute polling timeout as a compromise – after which the child will need to manually choose ‘Refresh’ to discover the fate of their request.
Screen brightness is another issue – the default maximum level of the TFT screen turns out to be retina-burningly bright. So ensuring sensible defaults saves a reasonable amount of power. (and probably stops the screen melting itself within a few weeks)
Deep Sleep Mode
Deep sleep support in the RTC sounds neat but it’s a double-edged sword. In case you’re just starting out, here’s the lowdown: if you send your Arduino device to sleep to save power, there’s no built-in ‘freeze’ for runtime variables or the execution stack. In other words, you can’t just do a device.sleep() then, on wake up, pick up where you left off. Your application will restart – but, in contrast to a hard power cycle, there is provision for basic storage of variables, counters, etc. in RTC memory, so you can write your own recovery routine. You can also preset a wake-timer, so with some clever coding we can ensure the Screenie wakes up well before the timer is due to go off.
Dude Where’s My Keyboard #1
Wifi provisioning is a challenge on devices with no keyboard. How do you get new users to connect Screenie to their wifi network with minimal hassle, no ability to input passwords, etc? I ran out of time on this one, and it’s just me using this right now so the code still has my SSID and password hard-coded (mental note: avoid git checkin until deleted 😳) but the WifiProvisioner library has been recommended as an existing solution to the problem, so I’ll try this in future. There’s a touchscreen version of the m5stick2 as well in case anybody wants to write the world’s most horrific on-screen keyboard.
Dude Where’s My Keyboard #2
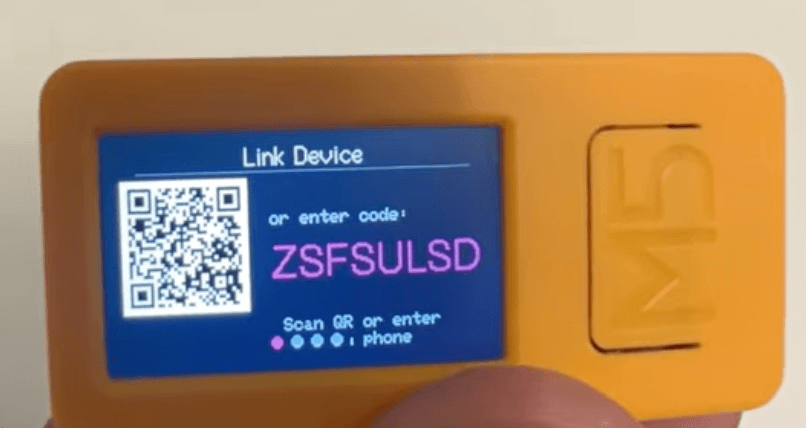
API provisioning is a problem that I did need to solve: how to get Screenie users associating the device with their account, and authenticating to give it permission to read/write data about their family screen time usage. This was an enjoyable problem to solve, and I ended up re-inventing the OAuth device pairing protocol to assign API pairing codes, then displaying these in a QR code, and relying on users to scan the code and login to Screenie on their phone. Read about it more on the Screenie developers page.
Pretty Things
It seemed a shame not to extend my requirements to support avatars per-child and all the usual bells and whistles to make it more professional-looking and attractive to use. I found some great avatar icons from the OpenMoji site (thanks guys) to add some more customisation and extra design chops.

Sneak peak – alpha build
OK then. I have a working version of the Screenie App ready for testing. If you’d like a sneak peak, check out the video below:
Next: Read Part 3 to discover how I built the web app, sync’d the two things together, and look at the showcase for the entire project, or even build your own.

About Carl Partridge — I’m a Fractional CTPO working with startups and SMEs to lead the design and build of robust, scalable tech products and AI integrations. Let’s chat about how I could turbo-charge your tech product.